Natural Dog Grooming
 Many pet owners groom their pets at home, and many use a professional groomer to help keep their coats in tip-top shape. Some dogs can be quite challenging to groom, and for some people, it is just easier to take their pet to a professional.
Trained groomers can often more safely handle tricky procedures such as nail clippings with temperamental animals. Also, if your dog has severe mats, it is safer to have them removed by an experienced groomer to avoid accidental cuts.
Regardless of whether you choose to use a groomer or not, it is important to do some of the brushing and simple grooming procedures yourself. Brushing helps you build a close bond with your pet, but just as importantly, it helps keep you informed about the condition of their skin, fur, nails, ears, and alert you to anything out of the ordinary.
First, we'll talk about home grooming, and how to bathe, brush, clip nails, and clean ears. Then, we'll talk about professional groomers and tips on choosing the best groomer for your pet.
Grooming At Home
 Establishing a regular grooming routine with your pup is simple, and can be a very rewarding and emotionally bonding experience. Not only does it give you the opportunity to spend quality one-on-one time together, but it allows you to become familiar with their body and check the overall condition of their skin, coat, teeth, and ears, and know quickly if something is amiss. It also keeps them looking and feeling great!
The earlier you start grooming, the better so that they will adapt to how it feels. Most dogs should be brushed at least once a week, with some longer haired or shedding breeds brushed daily. Bathing should be done depending on the need. When it comes to grooming, all you need are some simple tools, such as the right dog brush, a pair of nail clippers, natural dog shampoo, and cotton balls.
Home grooming includes almost everything a groomer would do, except you do it yourself:
- Brushing
- Nail Clipping
- Ear Cleaning
- Giving A Bath (as needed)
- Teeth Cleaning (2-3 times each week) ...learn about pet dental care
Brushing your pup...
Brushing your dog's coat is an important part of home grooming for their health. Brushing helps keep their skin and coat healthy and free from tangles, mats, and any debris from the garden. Brushing also distributes throughout the fur the natural oils produced by their skin, giving their coat a great shine.
Regular brushing helps you get to know your dog's body, so that you will easily notice any changes such as embedded ticks, scratches, and irritated skin. As part of a brushing session, make it a habit to run your fingers over their skin to feel for anything out of the ordinary.
Brushing should be a relaxing and rewarding experience for both yourself and your pet, and it is important to introduce them to brushing early and use the right tools. The gentle strokes should feel great against their skin. When brushing, take your time. Keep the initial sessions short and have treats handy until they are used to the experience. Be especially careful when removing mats or tangles, as pulling too hard can make the experience painful and something your pet will learn to dread.
The best way to build trust and make this a happy time for both you and your pup is to brush often, preferably every day in the beginning. This will also prevent mats and tangles from building up.
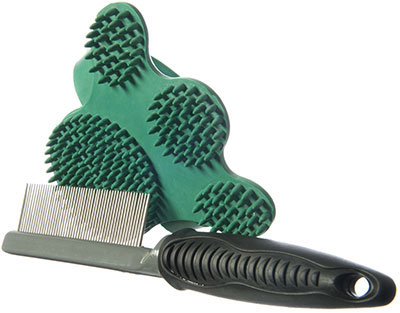
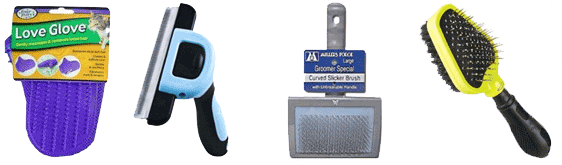
Use the Right Brush
Brushing might seem like a simple thing, but there are several types of brushes. You should use the right brush for your pup's coat, and some breeds may need more than one. Some brushes are designed specifically for de-shedding and double-coated breeds, while others are meant for short-haired coats. Although there are many different shapes and sizes, there are basically 5 different brush types:
- Bristle brushes (good for all coat types - the longer the hair coat, the more widely spaced and longer the bristles should be, and the coarser the hair, the stiffer the bristles should be)
- Wire pin brushes (with or without rubber-tipped ends (great for medium to long hair, and for curly or woolly coats as they have a deeper reach)
- Slicker brushes (fine wire bristles that are helpful in removing mats and tangles, great for short-coated breeds)
- De-shedders (these combs help to de-shed double-coated breeds that have a thick undercoat)
- Hound gloves (great for short and smooth-coated breeds)
Wiry-coated breeds: Wiry coated breeds such as Terriers have hair that does not shed the same way as other dogs. The best brushing tools for these coats are a pin brush, a stripping grooming tool, or a flea comb. A flea comb has teeth that are set tightly together, and help grab dead hairs and pull them out as you comb.
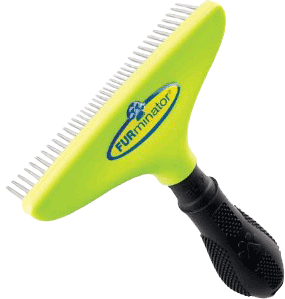
Use de-shedders for double-coated breeds: Many breeds such as Malamutes and Huskies are double-coated and shed their thick undercoat twice a year (known as "blowing their coat"). The shedding is extremely profuse during these times, and daily de-shedding is important and will go a long way to not only shorten the shedding time, but saving your house from being covered with a blanket of fur. It can be a time-consuming process, but luckily, coat blowing only lasts around 2-3 weeks.
The best tools for de-shedding are rakes, combs, or a de-shedding comb such as the FurMaster or Furminator.
Matt & tangle removal: Regular brushing helps to keep your pup's coat free from mats and tangles which, once they take hold, become worse if they are not removed. Mats can also form tight against the skin and be difficult and painful to remove. They can also harbor insects and become smelly, which can create skin problems. Mats should always be gently removed with the appropriate brush, or trimmed out very carefully with a pair of scissors (lift the mat and place your fingers below it, if possible, while trimming it out, to make sure you do not cut the skin).
If you find a tangle, attempt to separate it with your fingers, and use a comb to remove it. You can also use a de-tangling spray or rub cornstarch into tangles, which can make it easier to brush them out.
How Often Should You Brush
Different coat lengths have different brushing needs. Some long-coated breeds and silky breeds need daily grooming, and even missing one day can lead to matting and knots. Medium-coated breeds do well with a weekly groom, while short-coated breeds can do great with a bi-monthly session. If your pet sheds often, or is a breed that blows their coat (usually twice a year), daily brushing is highly recommended during those times or you will find furry tumbleweeds roaming around the house!
Brush in the direction of coat growth
Always brush in the same direction as the hair growth. Brushing against the grain can cause the skin to be pinched, or cause your pup discomfort.
Don't brush the skin
Brushing the skin (areas with very little fur) with a wire brush will feel very uncomfortable and can cause "brush burn." If you are using a wire brush, be gentle, and be especially careful around the stomach and inside of the legs as they are sensitive areas.
Offer lots of praise and love!
Your four-legged friend only wants to please you. If you can show that brushing is something that makes you happy, and you approach brushing in a loving, playful manner, it will go a long way in making this a happy experience. Offer lots of praise, love, and treats before and after brushing. This will increase their enjoyment, and help them to look forward to their brushing.
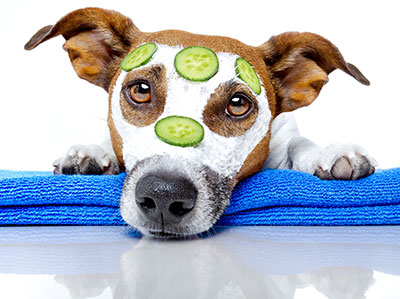
Giving a bath...
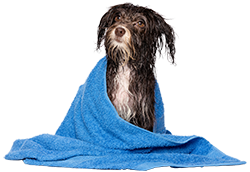 When it comes to bathing your pup, using natural products instead of synthetic ones is important not only for their health, but also for the environment. Here are a few supplies you'll need for bath time:
- Natural Shampoo (see home-made recipe below)
- Washcloth (for face washing)
- Cotton balls (to prevent water entering the ears)
- Medium or large towel(s)
- Bath tub (or garden hose, if outside and the weather is warm)
If you have a shower stall with a removable showerhead, this is the easiest way to wash your pup. If you have a yard and the weather is warm outside, using a garden hose while your dog is on a leash is also a great idea. If not, use the bath tub. If in the bathroom, shut the door! There is nothing worse than a soaking wet dog going on a mad dash around the house!!
- Place a cotton ball inside each ear to prevent any water from getting inside.
- Thoroughly soak the fur, including their belly, but be careful to avoid the face area. NEVER pour water directly over a dog's head.
- Pour the shampoo along your dog's back (the spine) and lather well. The thicker your dog's coat, the more shampoo you will need. Don't forget to wash the armpits, belly, all four legs, and the groin area. Especially clean their paws, which are typically the dirtiest area.
- Thoroughly rinse off the shampoo. This may take a few minutes, depending on how thick the fur is. Continue rinsing until no more shampoo residue is visible in the water.
- Using a wet, squeezed-out washcloth, wipe their face clean.
- Before attempting to dry, give your dog a moment to "shake" which is almost always inevitable, and which helps to remove a large amount of water. I usually give my Malamute a chance to shake two or three times before using towels.
- Grab a large towel and dry as best you can. The larger the dog, the more towels will be needed.
- Remove the cotton balls from each ear.
- Give treats and praise!
Until their fur dries, keep them inside unless the weather is very warm outside.
Shampoos
Not only can shampoos and conditioners irritate your pet's skin, but they can also cause allergic reactions. When choosing a shampoo, avoid all synthetic ingredients and unnecessary additions. If you take your dog to a groomer, ask if they use eco-friendly natural products.
Healthy ingredients include:
- Organic oils (e.g. coconut, sunflower, sesame, olive, jojoba)
- Essential oils (e.g. eucalyptus, peppermint, lavender, evening primrose)
- Herbs (e.g. chamomile, calendula)
Itchy, Sensitive Skin
If your dog has itchy, sensitive skin, it is likely due to dry skin, environmental allergies, or food allergies. A dull coat, and dry, itchy skin is often the result of a poor diet which can be easily fixed. Your pet's diet should consist of:
- High quality animal protein (either meat or fish, which should be the first ingredient on the list)
- High moisture content
- A small amount of fruits and veggies (mimicking the stomach contents of prey)
- No grains (especially corn, soy, or wheat - these are not canine foods and are popular allergens)
- Small quantity of starches (e.g. sweet potatoes, pumpkin, or yams)
Fatty fish (e.g. salmon, sardines, herring, and anchovies that are high in omega-3 fatty acids) are especially beneficial, helping to promote healthy skin and fur and resolve dry skin issues. Make sure the fish is wild caught.
Dogs that have a sensitivity to grains may also have a problem with shampoos containing oatmeal. Oatmeal is only recommend if your dog shows no adverse reaction such as itching.
| Home-made Dog Shampoo Recipe This recipe is wonderful for relieving itching from seasonal allergies. The ingredients are simple, natural, and completely non-toxic:
NOTE: Castile soap will create some suds, but will not foam up into thick suds like traditional shampoos. If your dog has no dry skin issues, feel free to use other castile soaps containing essential oils such as lavender, or other scents. For Flea Infestation If your pup has fleas, use Dr. Bronner's tea tree oil and leave the shampoo on for at least 3-5 mins. Use this formula only for fleas, because it can be very drying to their skin. |
How Often Should I Bathe My Dog?
Whenever your pup is dirty or smelly. It is not in the best interest of your pup to bathe them too often and when unnecessary. Sometimes, especially if it is muddy outside, only their paws will need to be cleaned by giving them a "footbath." If your pet suffers seasonal allergies, weekly bathing can significantly help reduce itching.
Getting Rid Of Odors
If your dog has been romping in the garden and is especially smelly, a mixture of 4 parts water to 1 part baking soda is a great deodorizer to pour onto your dog's coat (always avoiding the face and ears - never get water into their ears). Rub the mixture into your pup's coat before applying shampoo, then thoroughly rinse both off.
How to clip nails...
 Nail clipping is an important part of the grooming routine. If your dog walks or plays on concrete surfaces, this may not be necessary as the nails will naturally be kept short. If not, they can get too long and splinter if not trimmed regularly. This is not only painful, but can result in infection, or an altered walking gait.
Many people are nervous about trimming their dog’s nails. How do you know exactly where to cut? What if you trim the nail too short and cause bleeding? Many pets also seem to naturally dislike the sensation of people handling their feet. Although it can seem daunting at first, once you learn how to do it, it becomes quick and easy. If you feel uncomfortable, you can have your vet or a groomer do it for you (or ask them to teach you how to do it yourself).
Supplies You Will Need
- Clotting powder, e.g. Kwik Stop® Styptic Powder (in case of bleeding if skin is accidentally cut).
- Nail clippers, e.g. the Safari Professional Nail Clipper for either small/med dogs or large dogs.
- Treats.
As with brushing, begin nail trimmings early to help your pup get used to the clipping sensation. Have some tasty treats handy to help them associate nail trimming with something pleasant. If they learn that nail trimming is followed by something fun or tasty, they will be much easier to handle, and quickly learn to tolerate the experience.
Nail Clipping for the First Time
- Pick up one of your dog's paws, and gently touch the toes and nails. If your pet is a cuddler, give them a kiss on the nose while you play with their paws. Let them sniff the clippers and offer lots of praise, followed by a treat.
- Repeat this process several times.
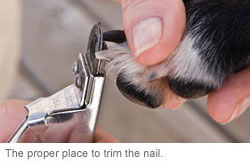
- Take your dog’s paw and hold it firmly but gently between your fingers. Insert the tip of your dog’s nail into the "guillotine" hole of the trimmer, holding the trimmer perpendicular to the nail (see image above).
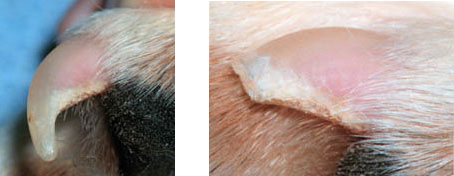
If your dog has clear nails, you will be able to see the skin underneath (also known as the "quick"). Trim close to the quick, but not too close (2-3 mm away).
If your dog has dark nails, use a flashlight and look under the nail to see where the skin ends, and be VERY careful you do not cut too close to the skin.
Don't forget to trim the dew claw (the extra claw several inches above their paw). - Offer plenty of praise and treats afterwards.
If You Make A Mistake
The most common mistake is to cut the nail too short, and cut the quick. This will cause the nail to bleed and your dog will likely yelp, pulling their paw away. The bleeding can be quite profuse and should be quickly seen too. Stay calm, and talk to your dog in a soothing voice, immediately giving them a treat or two. Apply the clotting powder directly to the bleeding area, which will stop the bleeding quickly. If you do not have any clotting powder, baking soda or corn starch are good alternatives.
Finish trimming the rest of the nails if you can, or if not, then wait a day or two.
If Your Dog Is Too Distressed
Some dogs can become very fearful, and even aggressive when any attempt is made to trim their nails. If this is the case, talk to your vet, an animal behaviorist, or qualified animal trainer to help your pet overcome this fear. You may decide that the best and safest choice is to have a professional groomer or vet take over nail clippings.
How to clean ears...
 Clean ears are essential to your dog's health and well-being, and an important part of grooming. Dirty ears are a breeding ground for bacteria and yeast, which can trigger painful infections. If you have not cleaned your dog's ears before, it is a great idea to have your veterinarian or a professional groomer show you how to do it.
You will need:
- Cotton balls (NOT cotton swabs or q-tips!), cotton pads, or gauze squares
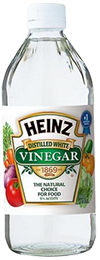
- A mixture of 50/50 water and white vinegar. White vinegar is a safe and natural ear-cleaning solution.
Simply moisten the cotton ball, pad, or gauze square with a small amount of solution, and gently but firmly clean their ear.
Never put anything smaller than a finger into your dog's ears. Cotton swabs can be especially dangerous and push dirt and debris deeper into the ear canal, even puncturing the dog's eardrum if they suddenly react or shake their head (and they often do, as they dislike anything put into their ear!).
If you notice any odor, of if you are concerned about an infection, see your vet who may advise a specific medication or the use of hydrogen peroxide.
Selecting A Professional Groomer
When selecting a groomer, here are some helpful tips:
- Start with a recommendation from a friend, neighbor, or veterinarian. Check Google and Yelp reviews online, or speak to others that have used the groomer so that you can get some feedback. You can also contact the National Dog Groomers Association of America for groomers in your area.
- Evaluate the grooming facility. Does it look and smell clean? How are the pet's handled? Do they use cages, and if so, are they the appropriate size? Does the groomer keep complete records (grooming, medical, vaccinations, etc.)?
- Does your groomer uses natural grooming products, rather than synthetic ones?
- Schedule a "meet and greet" session with yourself, your pup, and the groomer and see how they respond to eachother. Pay attention to the groomer's handling skills, and how they interact with your pup.
- If possible, ask to view a grooming session for a few minutes (but not with your pup, as this can create difficulties for the groomer if your pet can see you).
- Before you schedule a session, discuss any chronic health conditions you pet may have with the groomer, as well as any temperament issues that may interfere with successful grooming. Also discuss any skin conditions.
After the first grooming, judge for yourself how your pet looks and acts, and see if you are happy with the results. A good groomer will spend a few minutes with you to tell you how the grooming went, and if any issues cropped up that they feel you should be aware of (such as a hot-spot on the skin).
RELATED ARTICLES
- Why pets are getting sicker
- Fleas, ticks, & mosquitoes
- Natural dog grooming
- Pet vaccinations
- Declawing
- Healthy & balanced pet diet
- Home-cooked diet
- Raw food diet for pets
- Home-baked doggy treats
- Bones - nature's toothbrush
- Pet-proofing your home
- Preparing for a new pet!
- Treating common pet injuries
- Pet dental care